Revi turns this WordPress site into a real MCP server that Claude, ChatGPT, Cursor, and other AI assistants can connect to directly — reading, creating, and publishing content through natural language. This guide walks through the setup wizard, then shows how to connect every supported AI client.

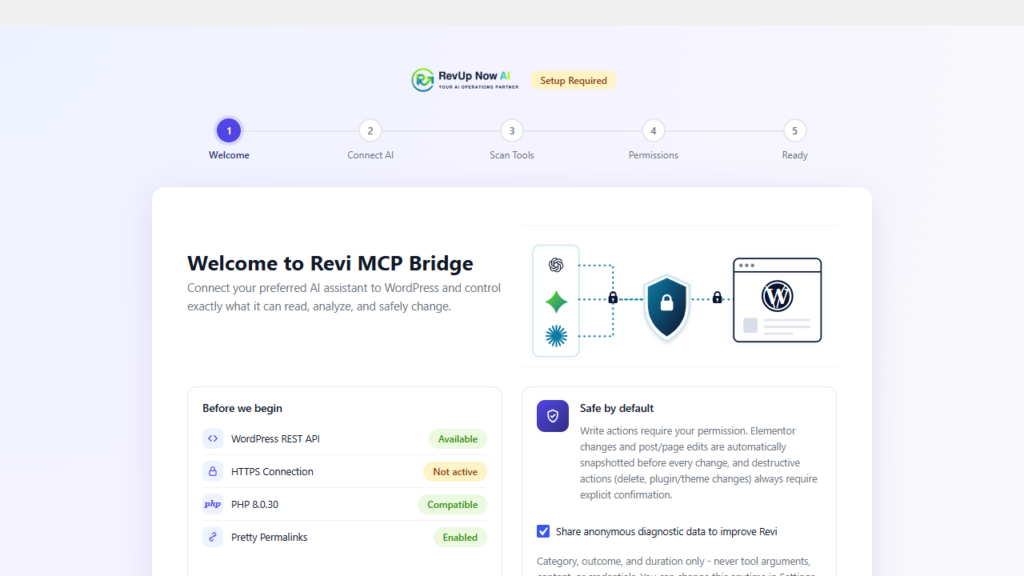
A live pre-flight check confirms your site is ready, and the wizard explains that nothing is exposed to AI until you finish setup.
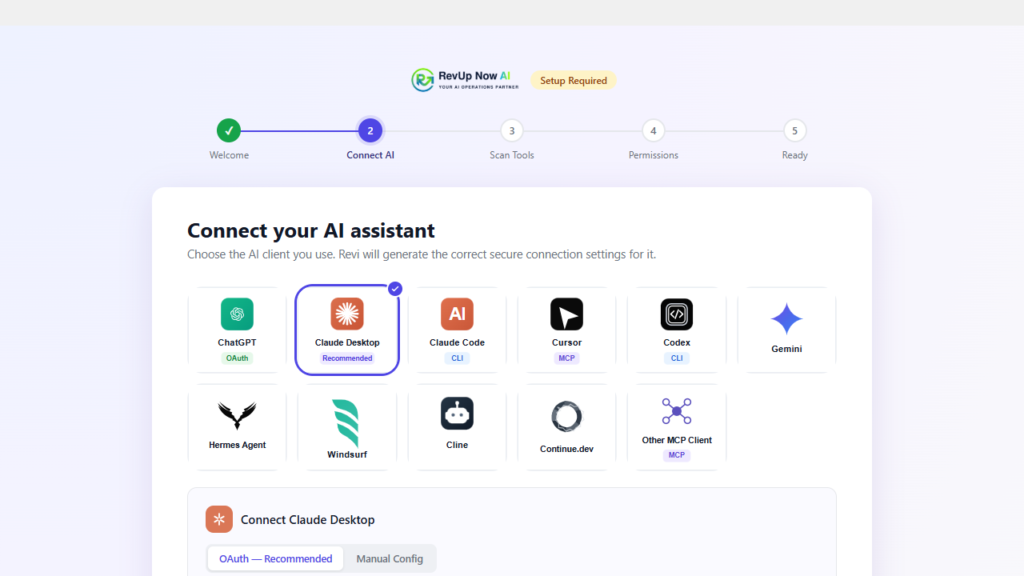
The wizard generates your API key and shows ready-to-paste config for Claude Desktop and Claude Code.
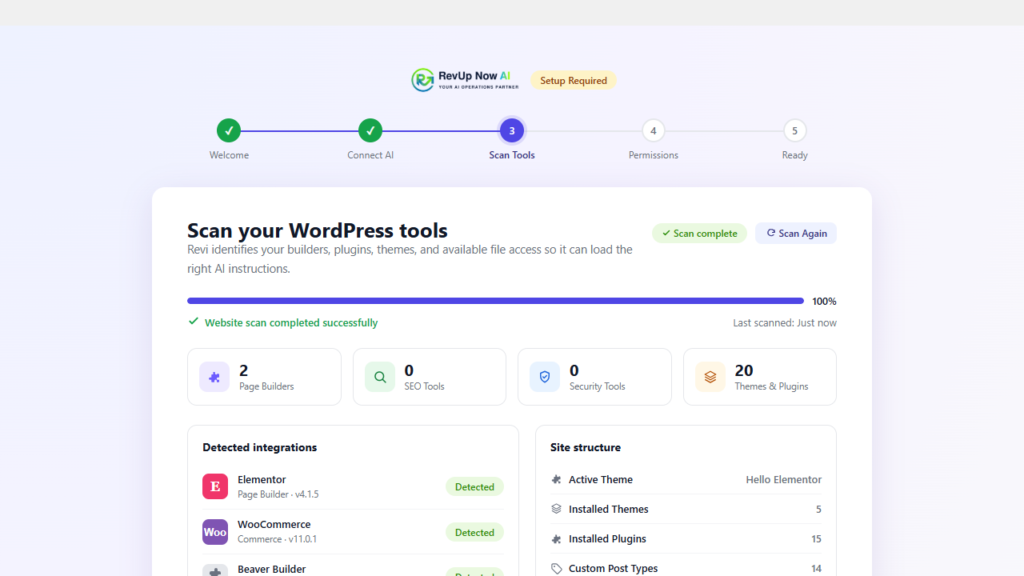
Revi detects what’s installed on your site — Elementor, WooCommerce, Yoast — and enables the matching tools automatically.
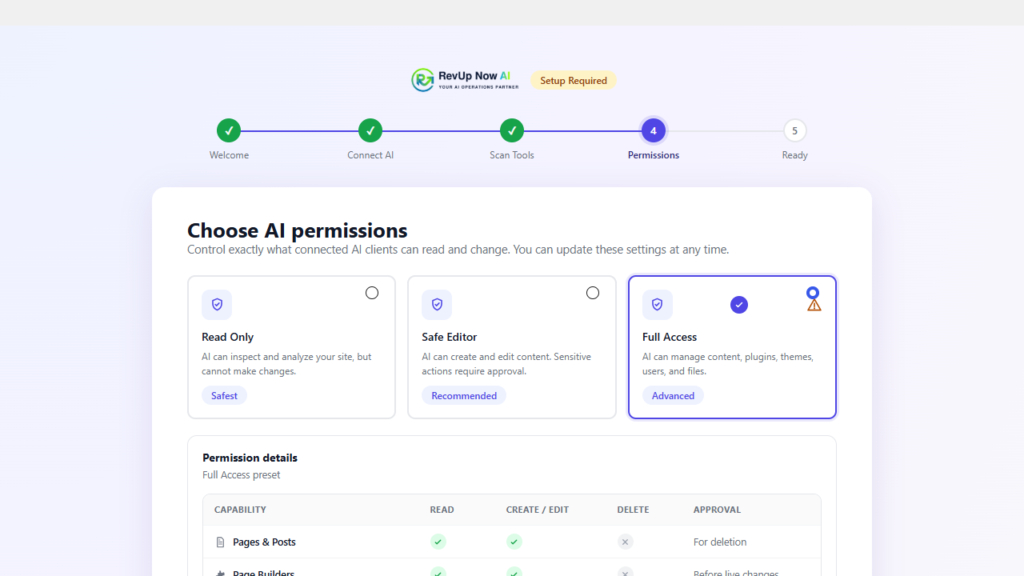
Choose granular scopes and a safety mode — publish approvals and automatic backups can be required before any AI-made change goes live.
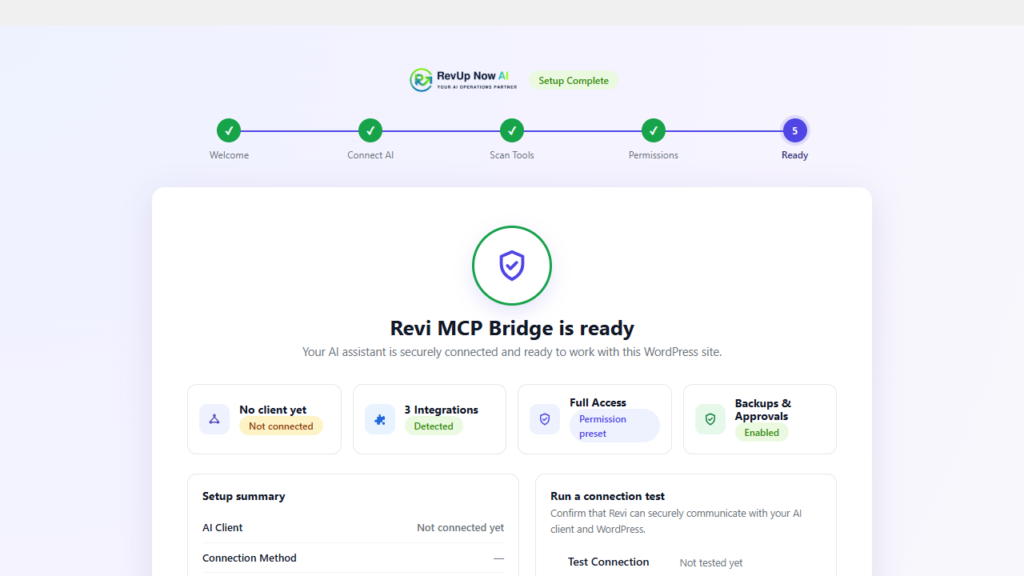
Setup is complete. Your API key is active and the site is ready to accept connections from any MCP-compatible AI client.
Every client below connects to the same endpoint: https://revupnow.ai/wp-json/revupnow-mcp/v1/mcp. Create an API key from Revi → Connection in your WordPress admin first.
Open Settings → Developer → Edit Config and add one of these, matching your OS. Windows needs the cmd /c wrapper — without it the connection silently fails.
Windows
{
  "mcpServers": {
    "wordpress": {
      "command": "cmd",
      "args": [
        "/c", "npx", "-y", "mcp-remote",
        "https://revupnow.ai/wp-json/revupnow-mcp/v1/mcp",
        "--header", "Authorization:Bearer YOUR_REVI_API_KEY"
      ]
    }
  }
}
macOS / Linux
{
  "mcpServers": {
    "wordpress": {
      "command": "npx",
      "args": [
        "-y", "mcp-remote",
        "https://revupnow.ai/wp-json/revupnow-mcp/v1/mcp",
        "--header", "Authorization:Bearer YOUR_REVI_API_KEY"
      ]
    }
  }
}Run from a terminal (add --scope user for every project, or --scope project to share via a committed .mcp.json):
claude mcp add --transport http wordpress "https://revupnow.ai/wp-json/revupnow-mcp/v1/mcp" --header "Authorization: Bearer YOUR_REVI_API_KEY"
Or add to .mcp.json directly:
{
  "mcpServers": {
    "wordpress": {
      "type": "http",
      "url": "https://revupnow.ai/wp-json/revupnow-mcp/v1/mcp",
      "headers": {
        "Authorization": "Bearer YOUR_REVI_API_KEY"
      }
    }
  }
}Add to .cursor/mcp.json (project) or ~/.cursor/mcp.json (all projects):
{
  "mcpServers": {
    "wordpress": {
      "url": "https://revupnow.ai/wp-json/revupnow-mcp/v1/mcp",
      "headers": {
        "Authorization": "Bearer YOUR_REVI_API_KEY"
      }
    }
  }
}Add to ~/.codeium/windsurf/mcp_config.json:
{
  "mcpServers": {
    "wordpress": {
      "serverUrl": "https://revupnow.ai/wp-json/revupnow-mcp/v1/mcp",
      "headers": {
        "Authorization": "Bearer YOUR_REVI_API_KEY"
      }
    }
  }
}In the Cline panel, go to Configure → Configure MCP Servers and add to cline_mcp_settings.json:
{
  "mcpServers": {
    "wordpress": {
      "type": "streamableHttp",
      "url": "https://revupnow.ai/wp-json/revupnow-mcp/v1/mcp",
      "headers": {
        "Authorization": "Bearer YOUR_REVI_API_KEY"
      },
      "disabled": false,
      "autoApprove": []
    }
  }
}Add to ~/.gemini/settings.json (user) or .gemini/settings.json (project):
{
  "mcpServers": {
    "wordpress": {
      "httpUrl": "https://revupnow.ai/wp-json/revupnow-mcp/v1/mcp",
      "headers": {
        "Authorization": "Bearer YOUR_REVI_API_KEY"
      }
    }
  }
}ChatGPT’s custom connector UI only accepts OAuth for remote MCP servers — not an API key. Enable OAuth in Revi → OAuth, then paste https://revupnow.ai/wp-json/revupnow-mcp/v1/mcp into ChatGPT’s connector settings. It will prompt you to sign in with your WordPress account automatically.
Any client that speaks the MCP Streamable HTTP transport can connect — check your client’s docs for its exact config file format. The generic shape:
{
  "mcpServers": {
    "wordpress": {
      "url": "https://revupnow.ai/wp-json/revupnow-mcp/v1/mcp",
      "headers": {
        "Authorization": "Bearer YOUR_REVI_API_KEY"
      }
    }
  }
}Ask it on a 15-minute call — you’ll get a straight answer either way.